A DIY Statement Necklace That Wows
"During this special time of year, a DIY project can not only yield a thoughtful gift, but can be a great opportunity to gather your friends and family together for a fun "crafternoon."
By Madeline Trait of By Madeline Trait
PHOTOGRAPHY BY: LISA ANDERSON SHAFFER

PHOTOGRAPHY BY: LISA ANDERSON SHAFFER
MATERIALS:
90 minutes
At least 1 yard of fabric
Scissors
Iron
Wood beads -- we used 1-inch and 3/4-inch beads but you can choose any size you like
Embroidery thread
Sewing needle

PHOTOGRAPHY BY: LISA ANDERSON SHAFFER
STEP 1:
Cut your fabric into strips. For 1-inch beads the fabric needs to be 2.5 inches wide. For the 3/4-inch beads the fabric needs to be 2 inches wide. All strips should be no shorter than 30 inches. The length of the strip determines how long your necklace will be.

PHOTOGRAPHY BY: LISA ANDERSON SHAFFER
STEP 2:
With a hot iron, create a 1/4-inch hem on both sides of your fabric strip.

PHOTOGRAPHY BY: LISA ANDERSON SHAFFER
STEP 3:
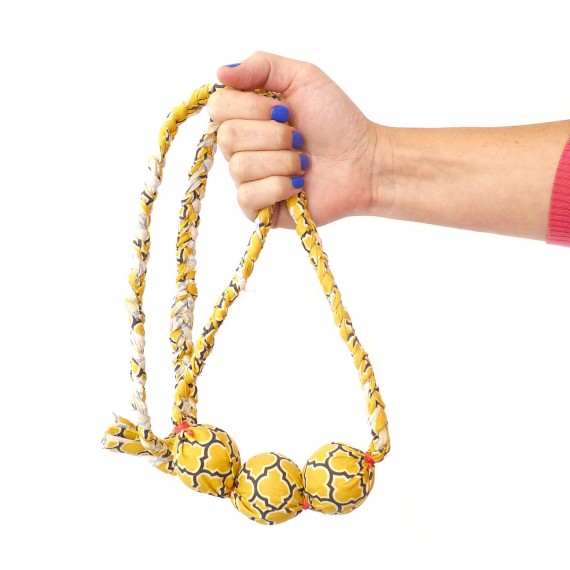
This is the fun part! To add your first bead, find the center of your fabric strip by folding it in half lengthwise. Next, place your first bead in the center of the fabric strip and wrap the fabric entirely around the bead. Once the bead is completely covered in fabric you will secure both ends with embroidery thread. Put your needle through the fabric to secure it tight, wrap it around several times, and then knot it at the end. You will repeat this step until all your beads are covered.

PHOTOGRAPHY BY: LISA ANDERSON SHAFFER
STEP 4:
To finish the necklace, tie the remaining loose fabric into knots and then knot both sides together. You can also cut the remaining loose fabric into 3 strips to braid and then knot it at the end. We did both.

Your necklace is complete and ready to wear!
Source : www.Marthastewart.com


Comments
Post a Comment